Steps to setup the Human Resources module in Odoo
Part-1
-
Human resource features at a glance
-
Creating an employee
-
Departments
Leaves
-
Leave Type
-
Allocation requests
-
Apply for Leave
-
Leave summary
-
Approval of leave
-
About
The Odoo human resource module efficiently manages the employee details, job positions, departments and leaves. An employee needs to be created in ‘Employee’ module (see below). Human resource managers can configure leave types and leave days within the ‘Leaves’ module. Leave requests and approval is also part of this process. The Job positions are tracked within departments, forecast number of employees and also those in the recruitment process.
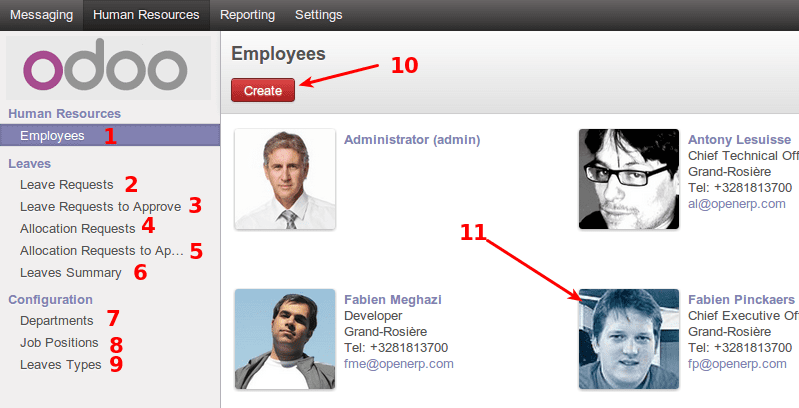
Human resource features at a glance
The following screenshot shows the sub menu items in the basic human resource section.
-
Under ‘Employees’ section. An employee can be created and removed.
Under ‘Leave request section’ Employee can request for the leave.
HR managers have the list of leave requests from the employees(Status: Not Approved). Its up to the HR Manager to take up the decision to approve or reject the leave.
- Allocation requests, can be raised by any employee to request allocation of a leave type. Future leave requests will then be deducted from an approved allocation. A leave request cannot be made unless an approved allocation exists with enough days remaining for the request.
HR managers will see this sub menu item which allows them to approve allocation requests.
Summary of leaves: Each employee will see their summary here. HR managers will be able to see leave types, number of leave days per type, and details thereof.
Departments can be listed assigned the job positions and recruitment processes.
Job positions: Lists all positions in the company, displays which department a positions falls under, number of employees, candidates in recruitment, etc.
Leave types: Lists the types of leaves applicable to the business.
- The create button under the employees sub menu to create a new employee and link them to a current system user where required.
This shows a preview of a currently listed employee of the business, along with contact details for the employee.
Creating an employee
The below screenshot showcases the employee creation interface. The interface is accessed by clicking on the create button in the employees sub menu.
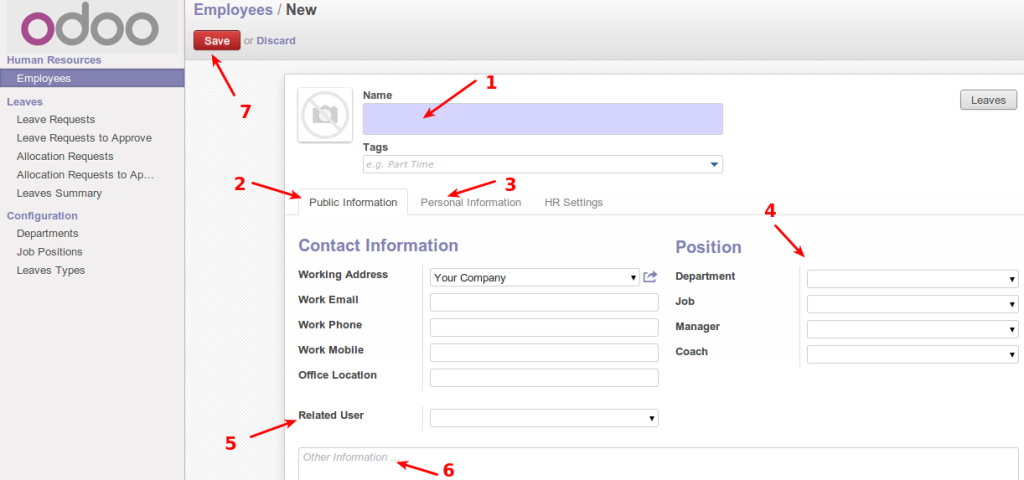
Steps
Employee name to be created.
Public information for the employee.
Personal information of the employee.
Details about the job position for the employee.
Relate the employee to a system users existing in OpenERP who have login access to the system.
Other information about the employee.
Once all the relevant information has been entered, the save button saves the new employee into the system.
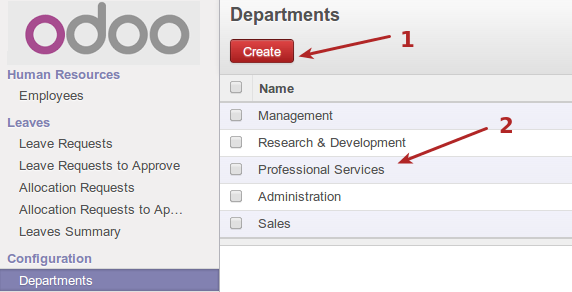
Departments
The following screenshot displays the department configuration, which can only be edited by HR managers. A HR manager can view the list of current departments, or create new departments here.
Leaves
Leave Type
The following screenshot displays the leave types configuration. Only visible to HR managers.
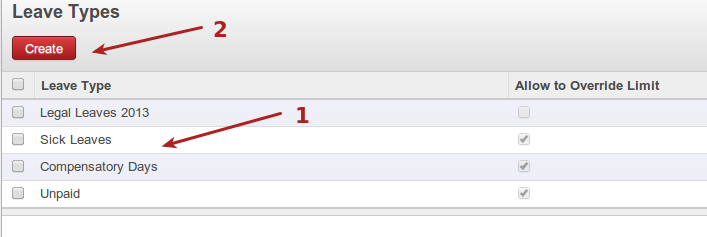
Current leave types for the business.
Create a new leave type.
Allocation requests
The following screenshots display how allocation of leave is requested.
Leave requests cannot be done without approved allocations with sufficient days remaining.

Current allocations requests, and their status. Use the create button to create a new allocation request.
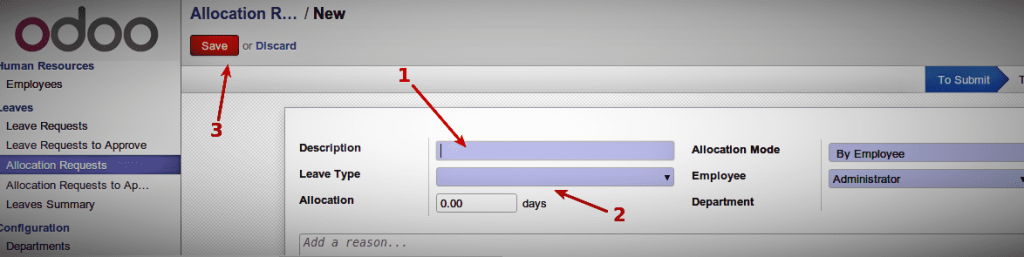
Allocation request description. eg. family leave.
Allocation details, including days allocated, and type of leave for this allocation.
Save the new allocation request. HR managers will be able to approve allocation requests.
Apply for Leave
The following screenshot displays the interface for requesting leave, which can be done by any employee.
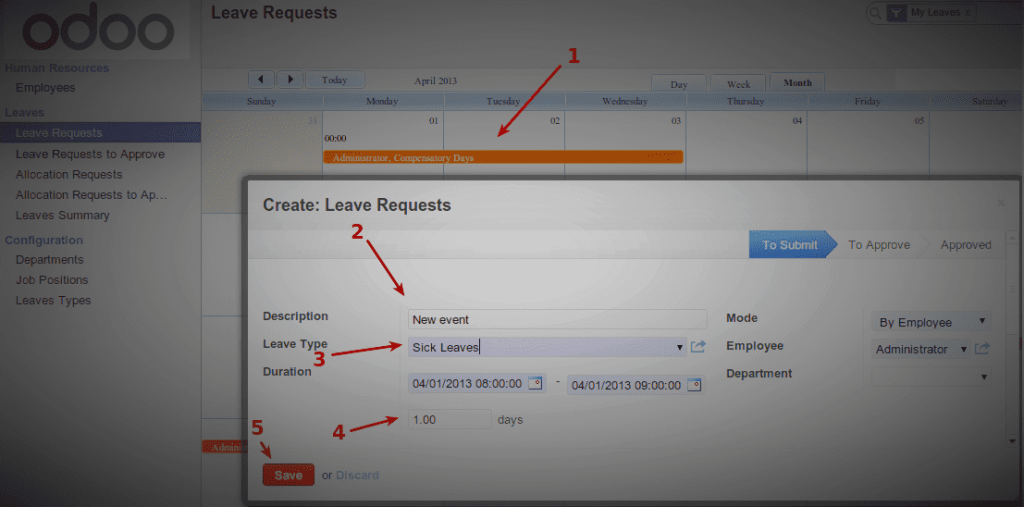
Calendar view of current leave. Clicking anywhere on the calendar prompts with an interface to create a new leave request for the day being clicked on.
Description and other details about the leave request.
Leave type being requested.
Days of leave requested, after the range of dates have been selected from the duration option.
Save button to finalize the request.
Leave summary
The following screenshot displays leave summary. Each employee will see the leave for themselves, but HR managers will see an overview of all leave types from all employees.
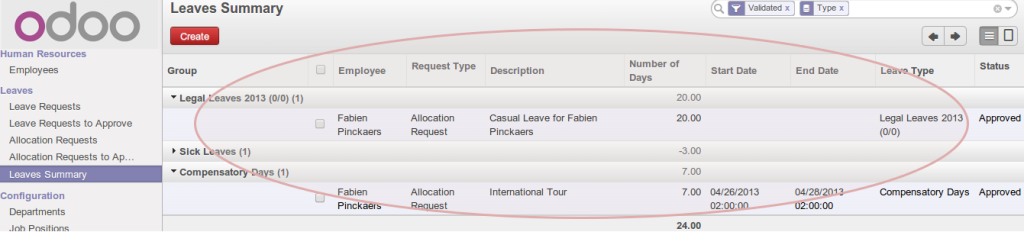
This displays various information about leave as seen by an HR manager. The details include employee, days of leave, leave types, etc.
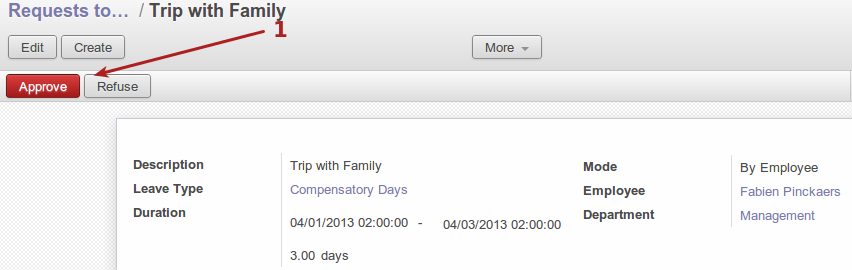
Approval of leave
Leave and allocation request approval is visible only to HR managers. The following screenshots display the interface for approving leave.
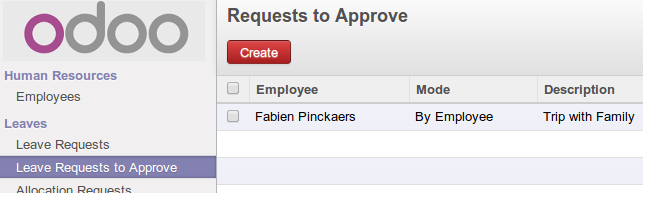
The below screenshot displays the list of requests awaiting approval, as seen by an HR manager.
Note: Please refer our next blog on ‘Recruitment ‘ in HR Module in Odoo