Introduction:
Multitenancy is a crucial architectural concept that allows a single instance of software to serve multiple clients (tenants), each with their own isolated data and configurations. Firebase, Google’s mobile and web application development platform, provides robust support for multi-tenancy, enabling developers to build scalable and secure applications for various use cases. In this article, we’ll explore how to implement multi tenancy in Firebase applications, covering key concepts and step-by-step implementation details.
Multi-tenancy refers to a software architecture where a single instance of an application serves multiple tenants, or users. Each tenant typically operates as if they have their own instance of the application, with data isolation and customization options. In the context of Firebase, multi-tenancy can be achieved by structuring your Firebase project to support multiple tenants, with each tenant having its own set of users and data.
Tenants (collection)
│
└── tenantId1 (document)
│   ├── name: "Tenant 1"
│   └── domain: "tenant1.example.com"
│   └── Users (subcollection)
│       └── userId1 (document)
│           ├── name: "User 1"
│           └── email: "user1@tenant1.example.com"
│       └── userId2 (document)
│           ├── name: "User 2"
│           └── email: "user2@tenant1.example.com"
│       …
│
└── tenantId2 (document)
    ├── name: "Tenant 2"
    └── domain: "tenant2.example.com"
    └── Users (subcollection)
        └── userId1 (document)
            ├── name: "User 1"
            └── email: "user1@tenant2.example.com"
        └── userId2 (document)
            ├── name: "User 2"
            └── email: "user2@tenant2.example.com"
        …
Prerequisites:
Before diving into the implementation, make sure you have the following prerequisites:
- Basic understanding of Firebase and its services.
- A Firebase project set up on the Firebase Console.
- Familiarity with JavaScript and Node.js for backend implementation (if applicable).
Step 1: Define Your Multi Tenancy Strategy
Before implementing multi tenancy in your Firebase application, it’s essential to define your multi tenancy strategy. Consider factors such as tenant isolation, data segregation, authentication, and authorization requirements specific to your application.
Step 2: Choose an Authentication Method
Firebase Authentication provides various methods for authenticating users, including email/password, social sign-in, and federated identity providers (Google, Facebook, etc.). Decide on the authentication method(s) you’ll use for your multi tenant application.
Step 3: Set Up Firebase Firestore or Realtime Database
Choose Firebase Firestore or Realtime Database as your database solution based on your application’s requirements. Firestore offers more advanced querying and scalability features, while Realtime Database provides real-time synchronization.
Step 4: Data Model Design
Design your data model to accommodate multitenancy. Determine how you’ll structure data to ensure isolation between tenants while maintaining scalability and performance.
Step 5: Implement Tenant Identification
Implement a mechanism to identify the current tenant in your Firebase application. This could involve using a unique identifier associated with each tenant, such as a subdomain, custom claims, or a separate collection in Firestore.
Step 6: Security Rules Configuration
Configure Firebase Security Rules to enforce tenant isolation and access control. Define rules that restrict access to tenant-specific data based on the authenticated user’s identity and role.
Step 7: Implement Tenant Onboarding
Create a workflow for tenant onboarding, allowing new tenants to sign up and provision their resources within your application. This may involve creating a dedicated UI for tenant registration and account management.
Step 8: Test and Iterate
Thoroughly test your multitenant Firebase application to ensure that data isolation, authentication, and authorization mechanisms work as expected. Iterate on your implementation based on feedback and potential edge cases.
Step 9: Monitor and Scale
Monitor the performance and scalability of your multi tenant application using Firebase Analytics, Cloud Monitoring, and other monitoring tools. Implement scaling strategies as needed to accommodate growing tenant bases.
Enabling multi-tenancy:
- Open the Identity Platform Settings page in the Google Cloud console.
- Click the Security tab
- Click Allow tenants at the bottom of the page.
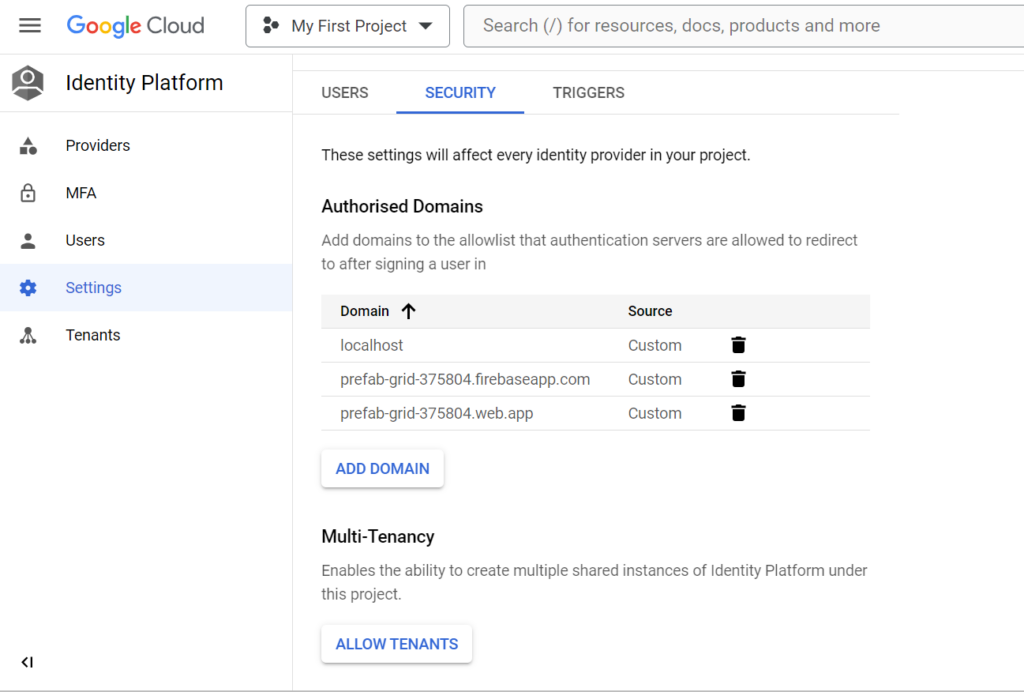
Clicking this button enables multi-tenancy and opens the Tenants page.
You are now ready to create your first tenant.
Creating a tenant:
1.Open the Identity Platform Tenants page in the Google Cloud console
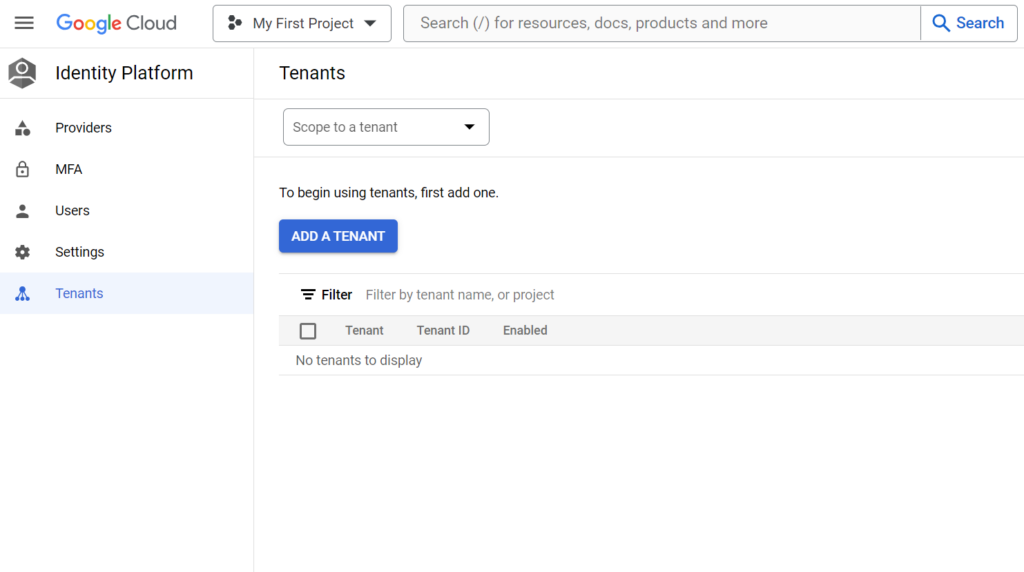
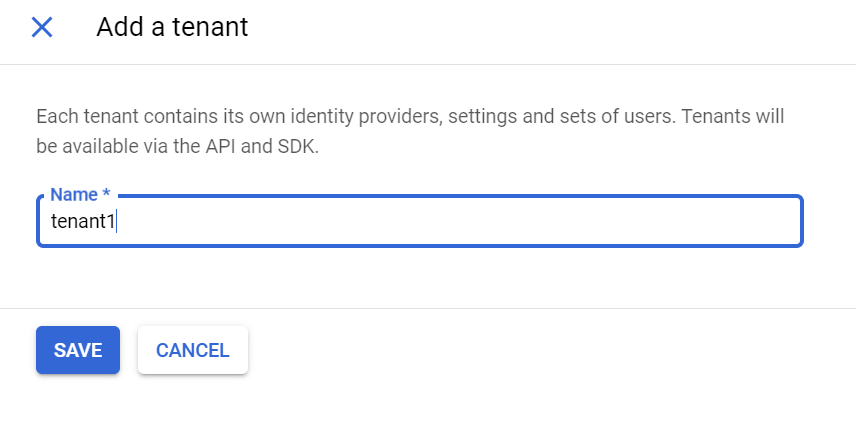
2.Click Add tenant.
3.Enter a Name for the tenant. This does not need to be unique; Identity Platform will automatically assign a distinct ID.
4.Click Save.
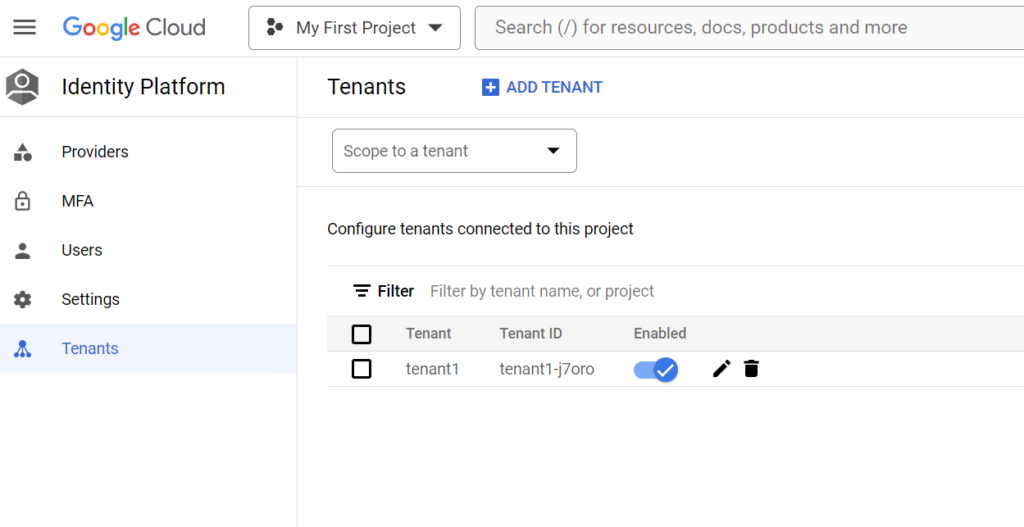
Selecting a tenant:
1.Use the drop-down menu in the top-left corner to switch between tenants.
2.Each tenant has its own providers, settings, and users. After you’ve selected a tenant, you can manage it the same way you manage a non-tenant Identity Platform project.

Disabling multi-tenancy:
- Use the Identity Toolkit API to disable multi-tenancy.
Authenticating with multi-tenancy:
- Go to the Identity Platform page in the Google Cloud console.
- On the top right, click Application setup details.
- Copy the code into your web app. For example:
import { initializeApp } from "firebase/app";

const firebaseConfig = {

  apiKey: "…",

  // By default, authDomain is ‘[YOUR_APP].firebaseapp.com’.

  // You may replace it with a custom domain.

  authDomain: ‘[YOUR_CUSTOM_DOMAIN]’

};

const firebaseApp = initializeApp(firebaseConfig);
Sign in with tenants
To sign in to a tenant, the tenant ID needs to be passed to the auth object. Note that tenantId is not persisted on page reloads.
import { getAuth } from "firebase/auth";

const auth = getAuth();

const tenantId = "TENANT_ID1";

auth.tenantId = tenantId;
Conclusion:
Implementing multi-tenancy in Firebase applications requires careful planning, design, and implementation to ensure security, scalability, and tenant isolation. By following the steps outlined in this guide, you can build robust and scalable multi tenant applications on Firebase, catering to diverse use cases and tenant requirements.