CAS (Central Authentication Service) is an single sign on enterprise solution protocol for web services. It aims to provide better way for permitting a user access multitude of web services each having its own means of authoritative. When the client visits an application desiring to authenticate to it, the application redirects it to CAS. CAS validates the client’s authenticity, usually by checking a username and password against a database (such as Kerberos, LDAP or Active Directory). If the authentication succeeds, CAS returns the client to the application, passing along a security ticket. The application then validates the ticket by contacting CAS over a secure connection and providing its own service identifier and the ticket. CAS then gives the application trusted information about whether a particular user has successfully authenticated.
Installation
The following prerequisites need to be installed before doing CAS configurations.
- Apache Tomcat 7
- Maven
- CAS ZIP download.
1.1 Apache Tomcat 7
Download latest version of Apache tomcat 7 from
http://tomcat.apache.org/download70.cgi and extract it.
Set path in environmental variables. Now, start server and verify tomcat is working or not.
1.2 Maven
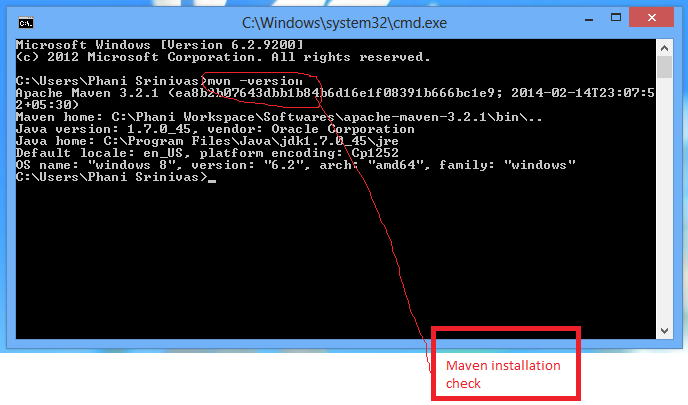
Figure 1.2.1: Shows execution of mvn version
Download maven latest (zip or tar) from http://maven.apache.org/download.cgi extract to local drive. Set maven path (“C:Path_toapachemaven3.2.1bin”) in environmental variables (“PATH”). Now open command prompt and type “mvn version”. It will display properties of MVN. It means, maven is successfully installed.
1.3 CAS
Download latest version of CAS bundle, extract on to the drive.
1.3.1 Installation of CAS using HTTPS
i.In the extracted CAS bundle, change directory to “cas-server-3.5.2cas-server-webapp” using command prompt.
ii) Type the following command
c:>mvn clean install
It shows installation process with series of text scrolling, at the end we can see a message
BUILD SUCCESS, as shown in below figure. It generates “cas.war” 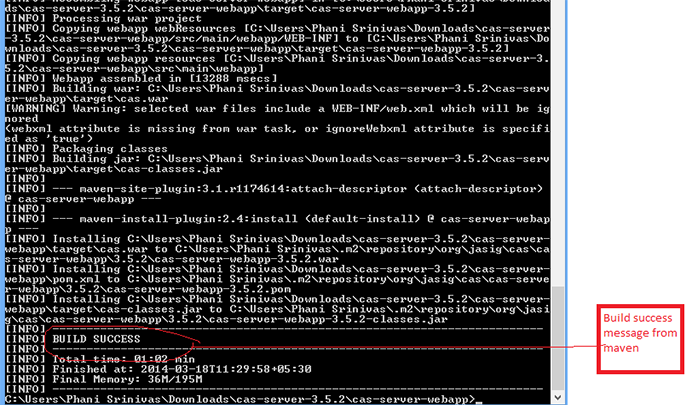
Fig 1.3.1: Shows Build process
iii)After Build process, browse to directory
“c:path_to..casserve3.5.2casserverwebapptarget” , select “cas.war” and copy it to “c:path_to….apachetomcat7.0.52webapps”.
Below screenshots shows the process
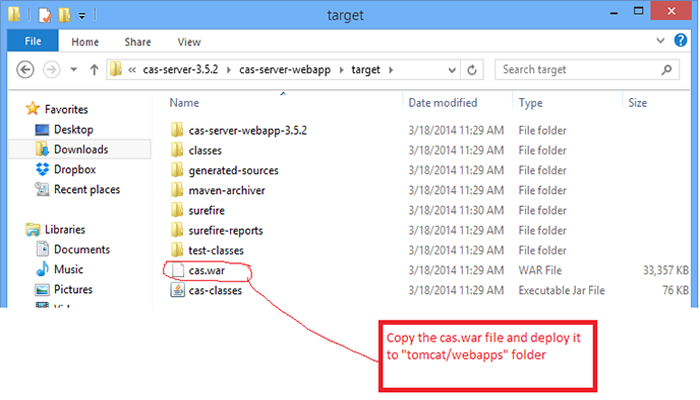
Fig 1.3.2: shows cas.war
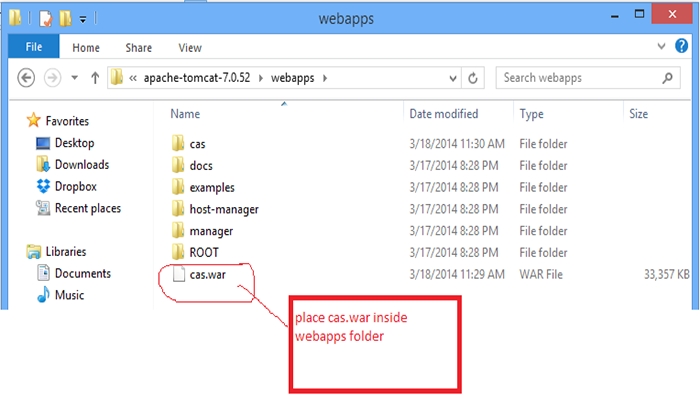
Fig 1.3.3: shows cas.war in tomcat webapps.
iv) Now, start tomcat server and check “ http://localhost:8080/cas/login ”. It shows following screen.
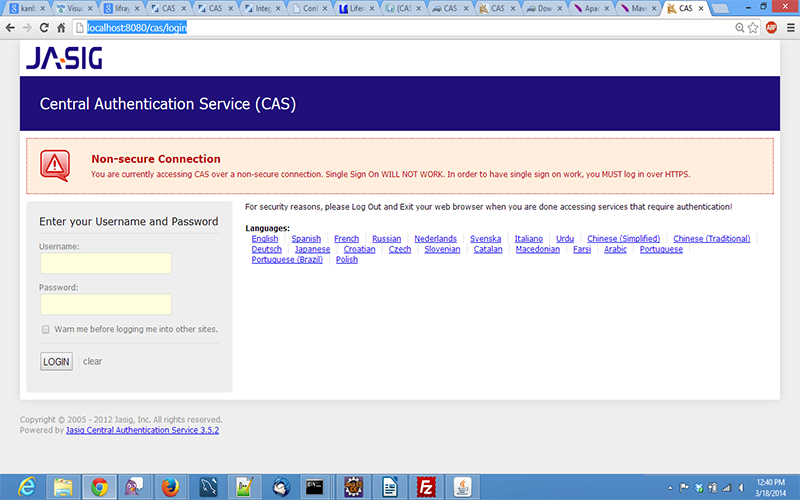
Fig 1.3.4: shows cas login screen
V) In order to remove the above “error”(Non secure connection) we can make the connection as “https” then “error” will resolve and will enable connection in https mode.
1.4 SSL Enable in Tomcat
To generate SSL certificate (self signed) follow below procedure with root privileges :
#keytool -genkey -alias tomcat -keypass changeit -keyalg RSA
Note : Be sure to use the keytool that comes with the Java VM
(%JAVA_HOME%/jre/bin/keytool),
as on some systems the default points to the GNU version of keytool, where the two seem incompatible.Answer the questions: (note that your firstname and lastname MUST be hostname of your server and cannot be a IP address; this is very important as an IP address will fail client hostname verification even if it is correct)
Enter keystore password: changeit
- What is your first and last name?
[Unknown]: localhost - What is the name of your organizational unit?
[Unknown]: - What is the name of your organization?
[Unknown]: - What is the name of your City or Locality?
[Unknown]: - What is the name of your State or Province?
[Unknown]: - What is the twoletter country code for this unit?
[Unknown]: - Is CN=localhost, OU=Unknown, O=Unknown, L=Unknown, ST=Unknown, C=Unknown correct?
[no]: yes
Then enter the command:
#keytool -export -alias tomcat -keypass changeit -file %FILE_NAME%
Finally import the cert into Java’s keystore with this command. Tomcat uses the keystore in your JRE (%JAVA_HOME%/jre/lib/security/cacerts)
#keytool -import -alias tomcat -file %FILE_NAME% -keypass changeit -keystore %JAVA_HOME%/jre/lib/security/cacerts
Open the HTTPS port in tomcat server
Edit “server.xml“ file located at /apachetomcat7.0.26/conf/server.xml and uncomment the below :
<!–Define a SSL HTTP/1.1 Connector on port 8443– > <Connector port=”8443″ maxHttpHeaderSize=”8192″ maxThreads=”150″ minSpareThreads=”25″ maxSpareThreads=”75″ enableLookups=”false” disableUploadTimeout=”true” acceptCount=”100″ scheme=”https” secure=”true” clientAuth=”false” sslProtocol=”TLS” />.